

Bison Relay wallet features
An innovative lightweight wallet, rich in functionality, from On-chain payments to Lightning Network micropayment processing.
If you remove Bison Relay’s main features, you’ll find an incredibly advanced and easy to use SPV wallet with enabled Lightning Network capabilities. Why is this important, I hear you ask?
Well, simply put, it’s ready for mobile integration and will be easily installed on older mobile devices without needing masses of storage or memory. SPV wallets are lightweight as they don’t require the downloading of the full blockchain. It’s essential to note that Bison Relay is not a full node wallet, like Decrediton. Bison Relay is suitable for small and micro-transactions and storing small amounts of DCR.
Another interesting thing about Bison Relay and its wallet functionality is, it’s non-custodial, meaning, users are in full control of their funds at all time. This wallet can also process on-chain transactions as efficiently as it can process Lightning Network transactions.
Let’s have a look at some of this functionality by heading over to the “LN Management” tab and selecting the “overview” section. In this area, we can see an overview of our balances.
Overview section
Max sendable and max receivable are our Lightning Network balances. Max receivable is used for receiving tips and payments on the Lightning Network, this amount needs to be as high as possible. The balance shows the amount of channel liquidity you can receive from a Lightning Liquidity Provider (or LP). When you start using Bison Relay, this can be a hard concept to get your head around. But just remember, if this is low, you can’t receive lightning payments.
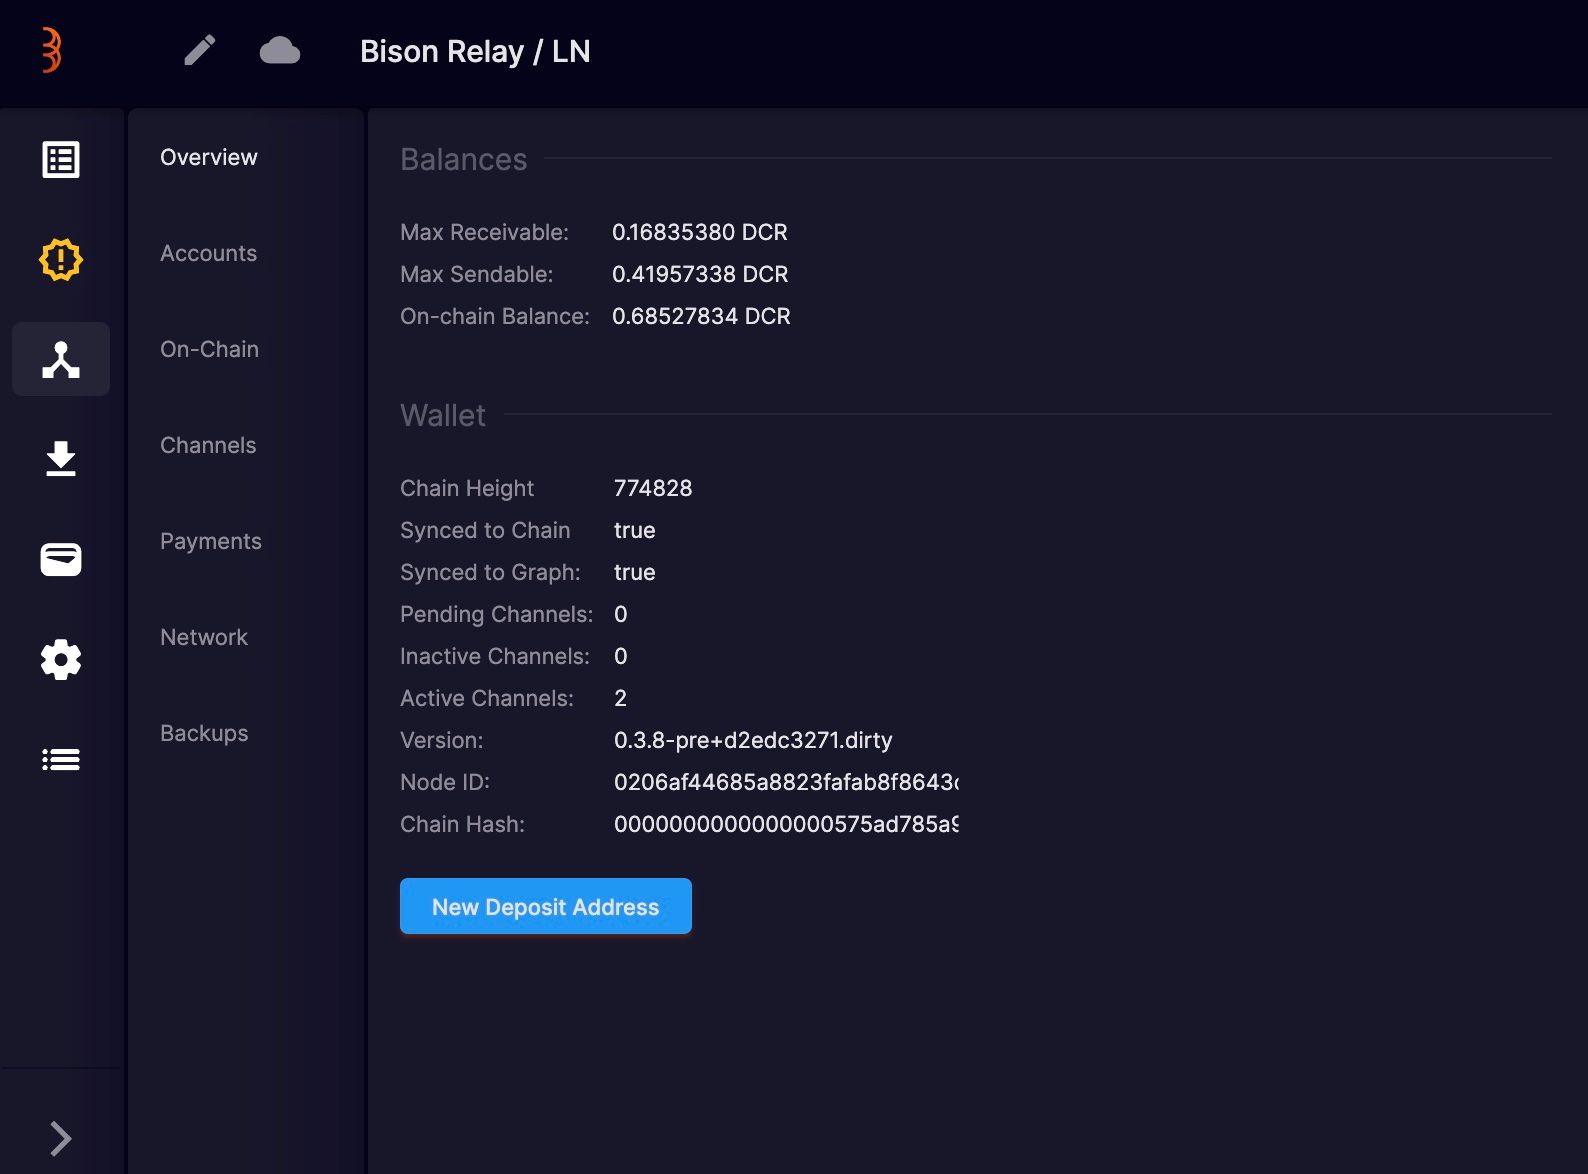
The Max sendable is the balance you’ll use for sending and receiving messages and sending payments or tips to other users. If you’re only using Bison Relay for sending and receiving messages, 0.1 DCR will last a very long time.
The On-chain balance is the amount you have in your SPV wallet that’s not being used by the Lightning Network. This balance can be used for any on-chain transaction as well as for creating lightning channels.
The wallet area shows if your wallet is in sync with the blockchain. We are up-to-date and ready to go.
If you want to receive funds to your default account, click the “Generate Deposit Address” to make a new receive address. This also displays a QR code to help with receiving funds from external wallets.
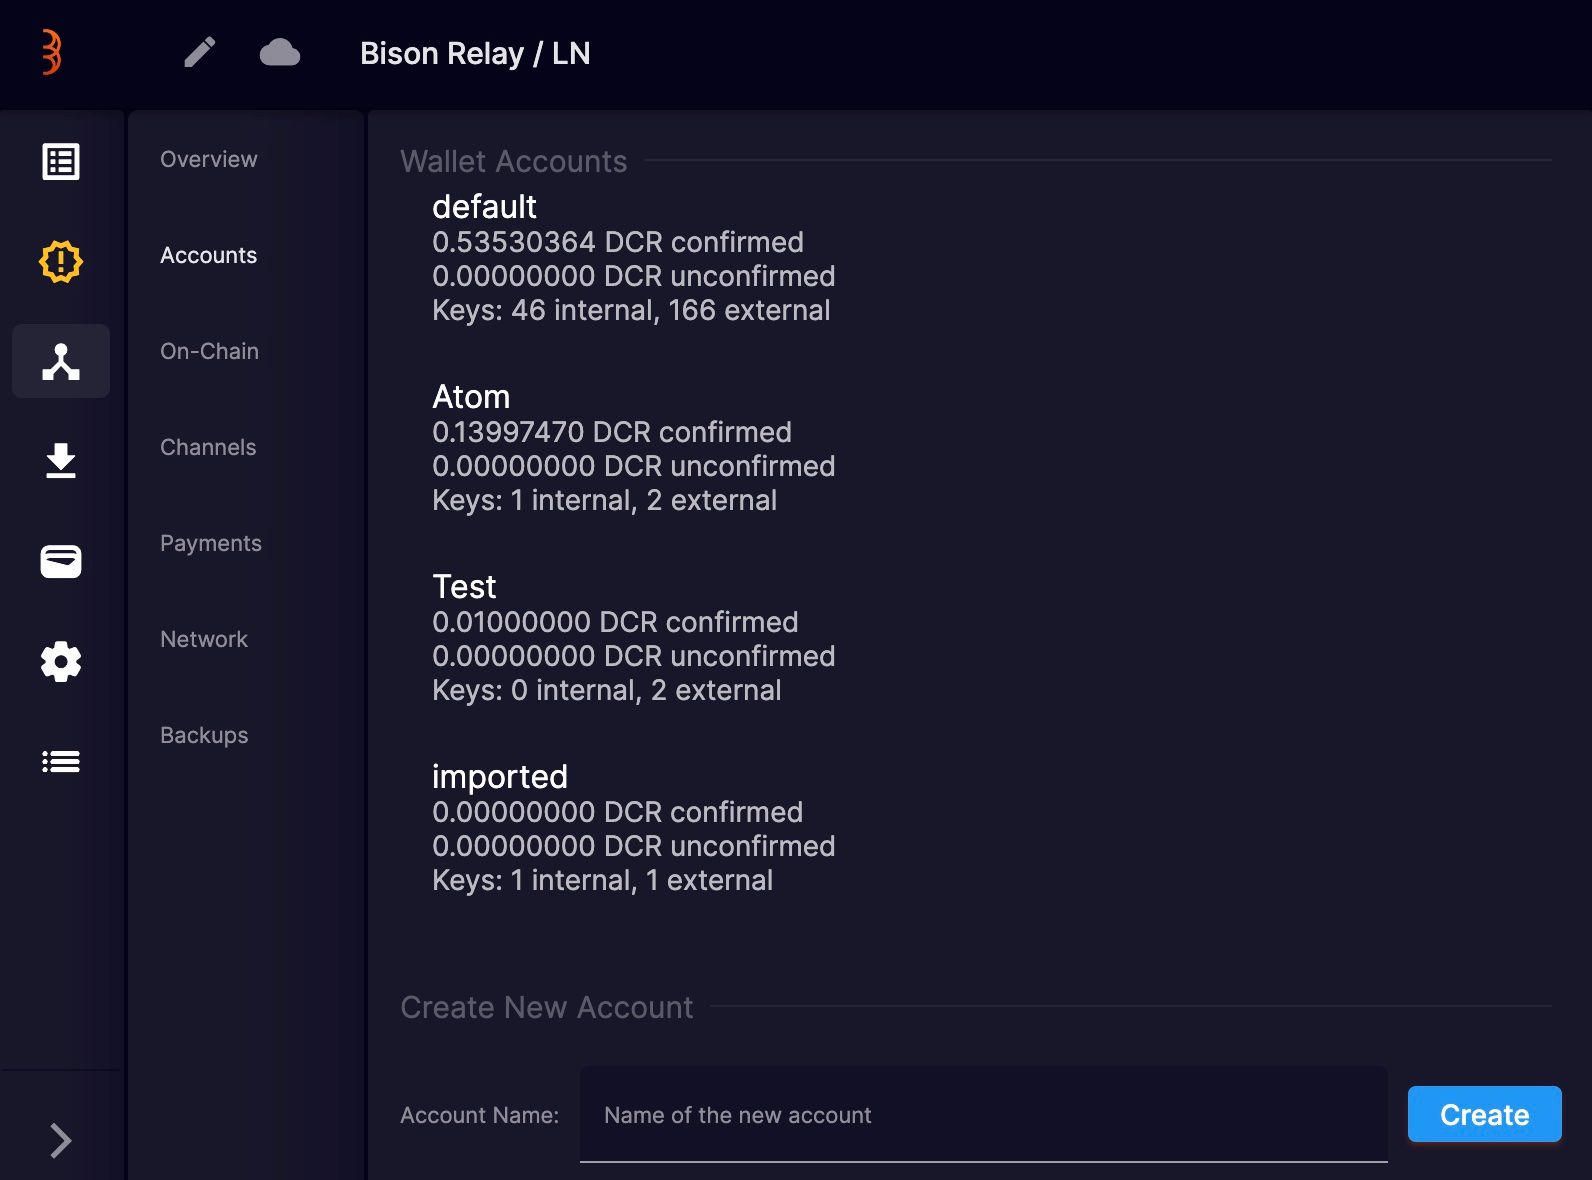
Accounts section
Bison Relay allows you to create accounts effortlessly, which enables you to separate your on-chain funds. For example, enter a name and press create, and the account is made.
On-chain section
If you want to move funds into this account, we’ll move over to the on-chain area. Here, we select the account to receive funds and generate an address. Then in the send section we choose the account the money will come from, paste the address, enter the amount and press the” Send on-chain button.
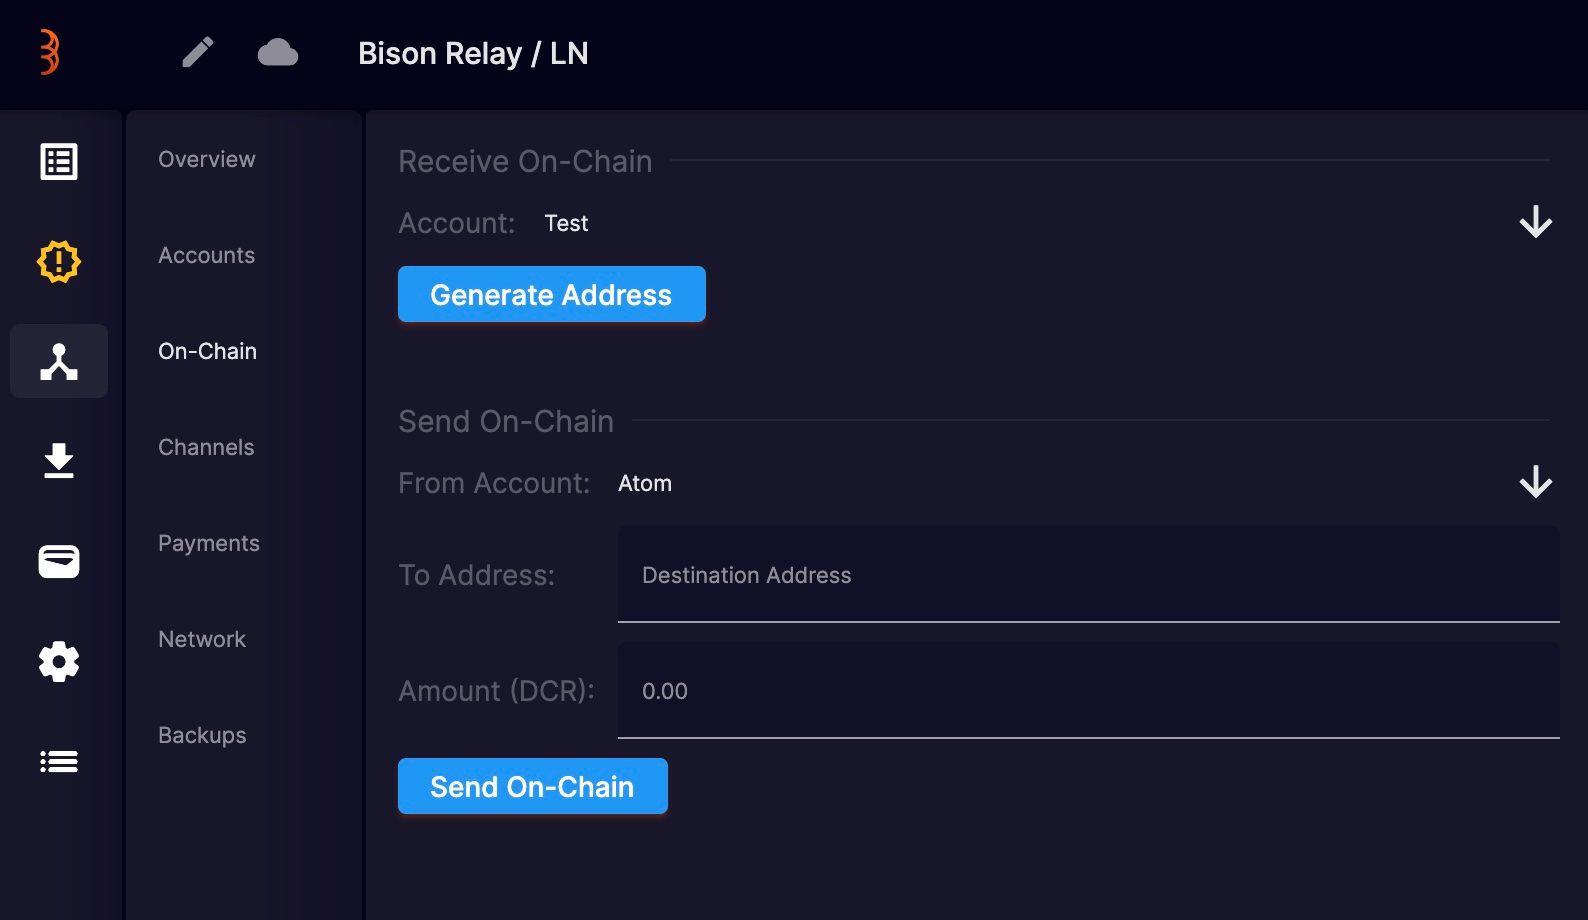
This area can also be used if we want to receive funds from someone using a different wallet. For example, I’ll copy the address, head over to the chat section and paste it in a chat to phoenix and wait for him to pay me. This address can be pasted into any chat platform or web page, not just Bison Relay. Allowing you to receive on-chain tips, donations, or payments to this wallet.
Channels section
The channel’s area is the Lightning Network section. This is where we can re-balance or set up our Lightning Network channels. In my case, the top one is my “Inbound channel” for receiving payments and tips and the bottom one is my “outbound” channel used for sending and receiving messages and sending tips and payments. At the moment, there isn’t an obvious way of knowing which is which. What I tend to do is load each one up with different amounts of dcr. The inbound has 0.5 dcr capacity and the outbound has 0.1dcr capacity.
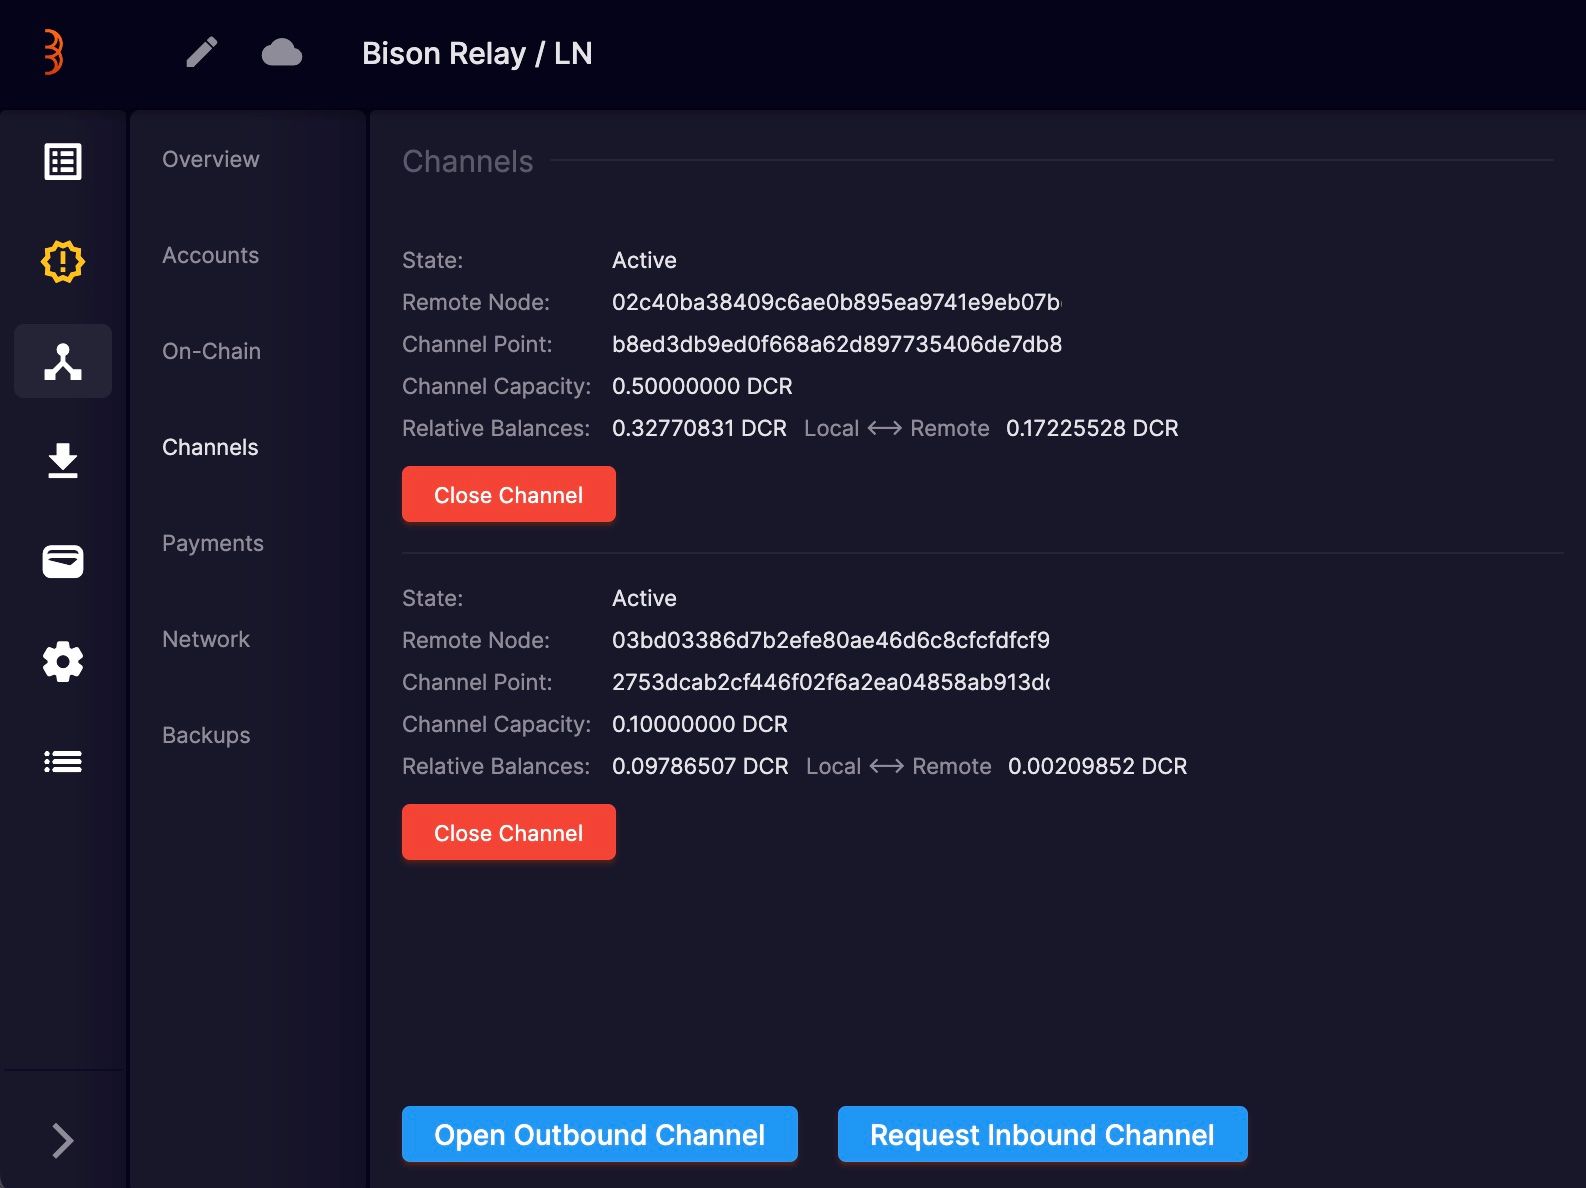
If you need to re-balance these channels due to being low on funds, which can happen, especially if you are sending and receiving plenty of tips and payments. You’ll need to close the channel with low funds and the open another one. At this point, it’s very useful to know which channel is which, in the past, I’ve ended up opening two outbound channels which meant I had no active inbound channel. This got really confusing, I couldn’t work out why I was unable to receive funds.
Payment section
The payment area, gives the user the ability to generate personalised and unique Lightning Network invoices. LN invoices are used in every LN transaction but are generated automatically. In this area, you get to create your own invoice and send the “invoice ID” to the person you want payment from.
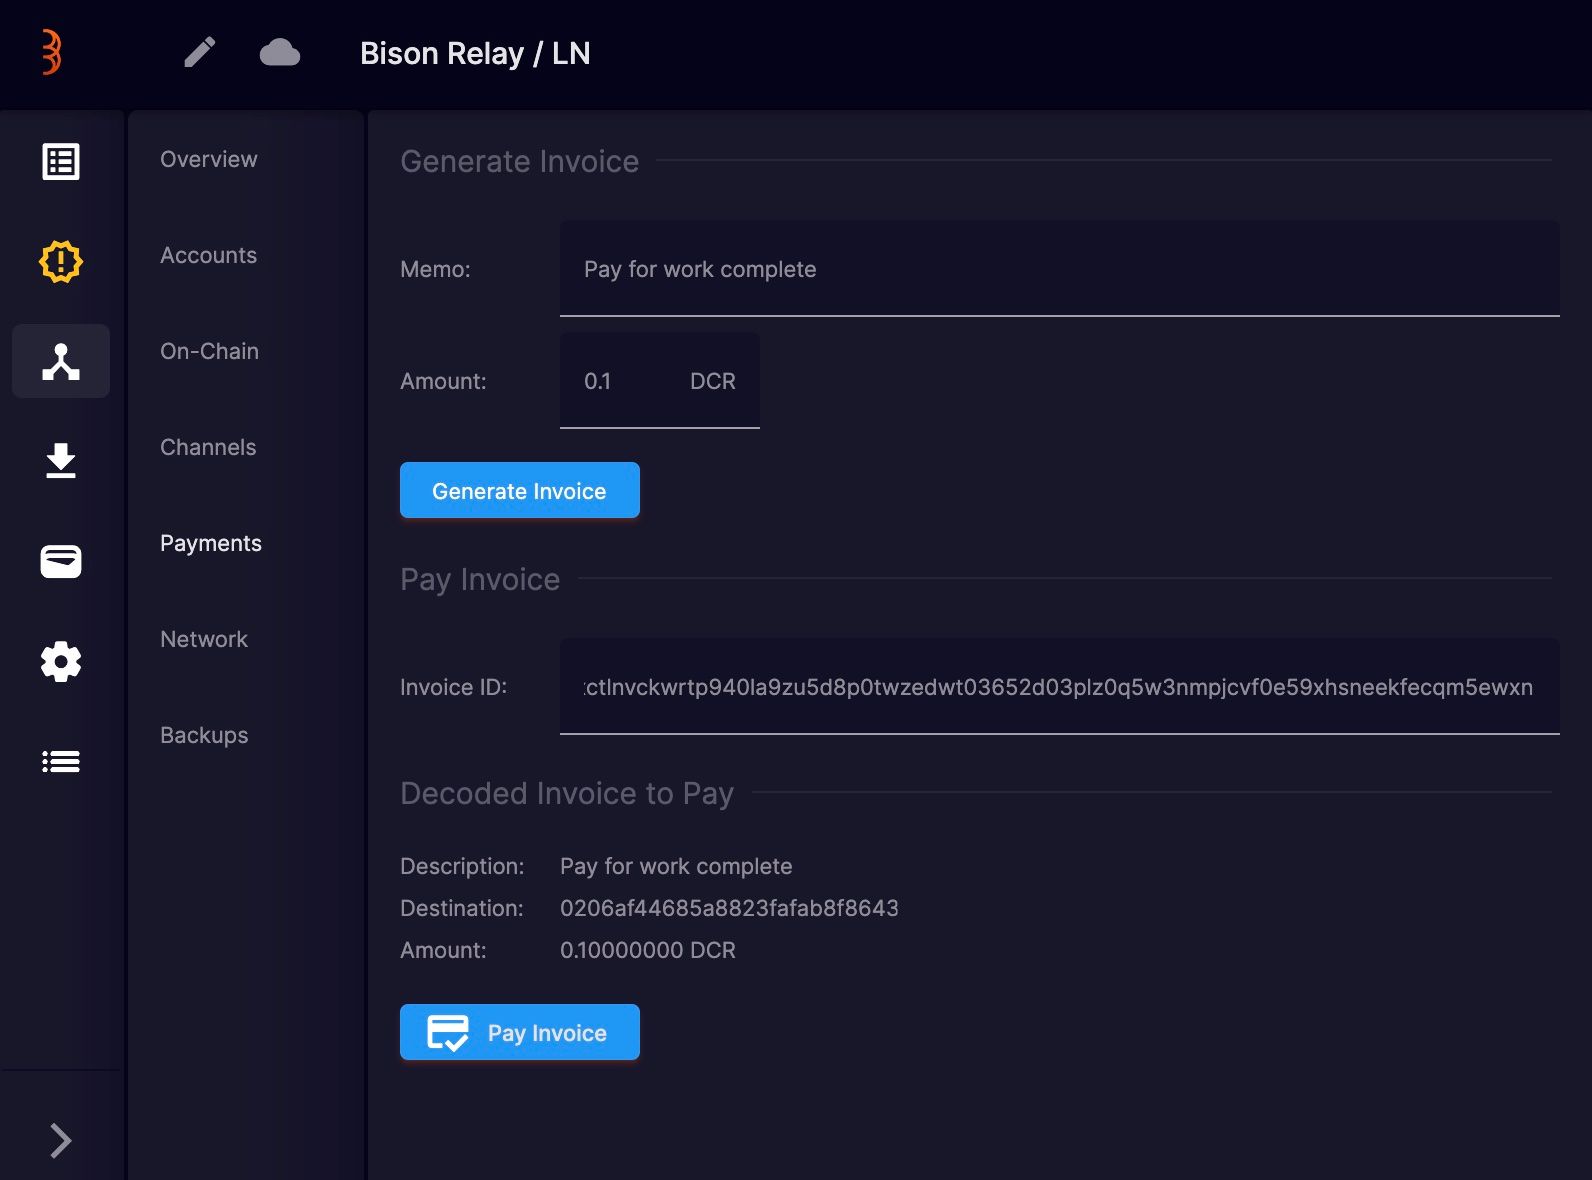
How this works, type in a description of what you want payment for. Enter the amount to be paid and press the “Generate invoice” button. From here, copy the “invoice ID” and send it to the person you want payment from.
So, you can see how this looks, on the other side, I’ll complete the invoice here. Paste the invoice ID and press enter. This decodes the invoice to provide the full details to the person who’s paying it. If they are happy, they can hit the “Pay invoice” button and the invoice will be paid over the Lightning Network in a matter of seconds. In this case, the invoice failed because you’re unable to pay your own invoices.
Network section
The network section provides details of peers you are connected to and allows you to connect to peers manually. I’ve not used this section yet, but once I find a reason to, I’ll do an update.
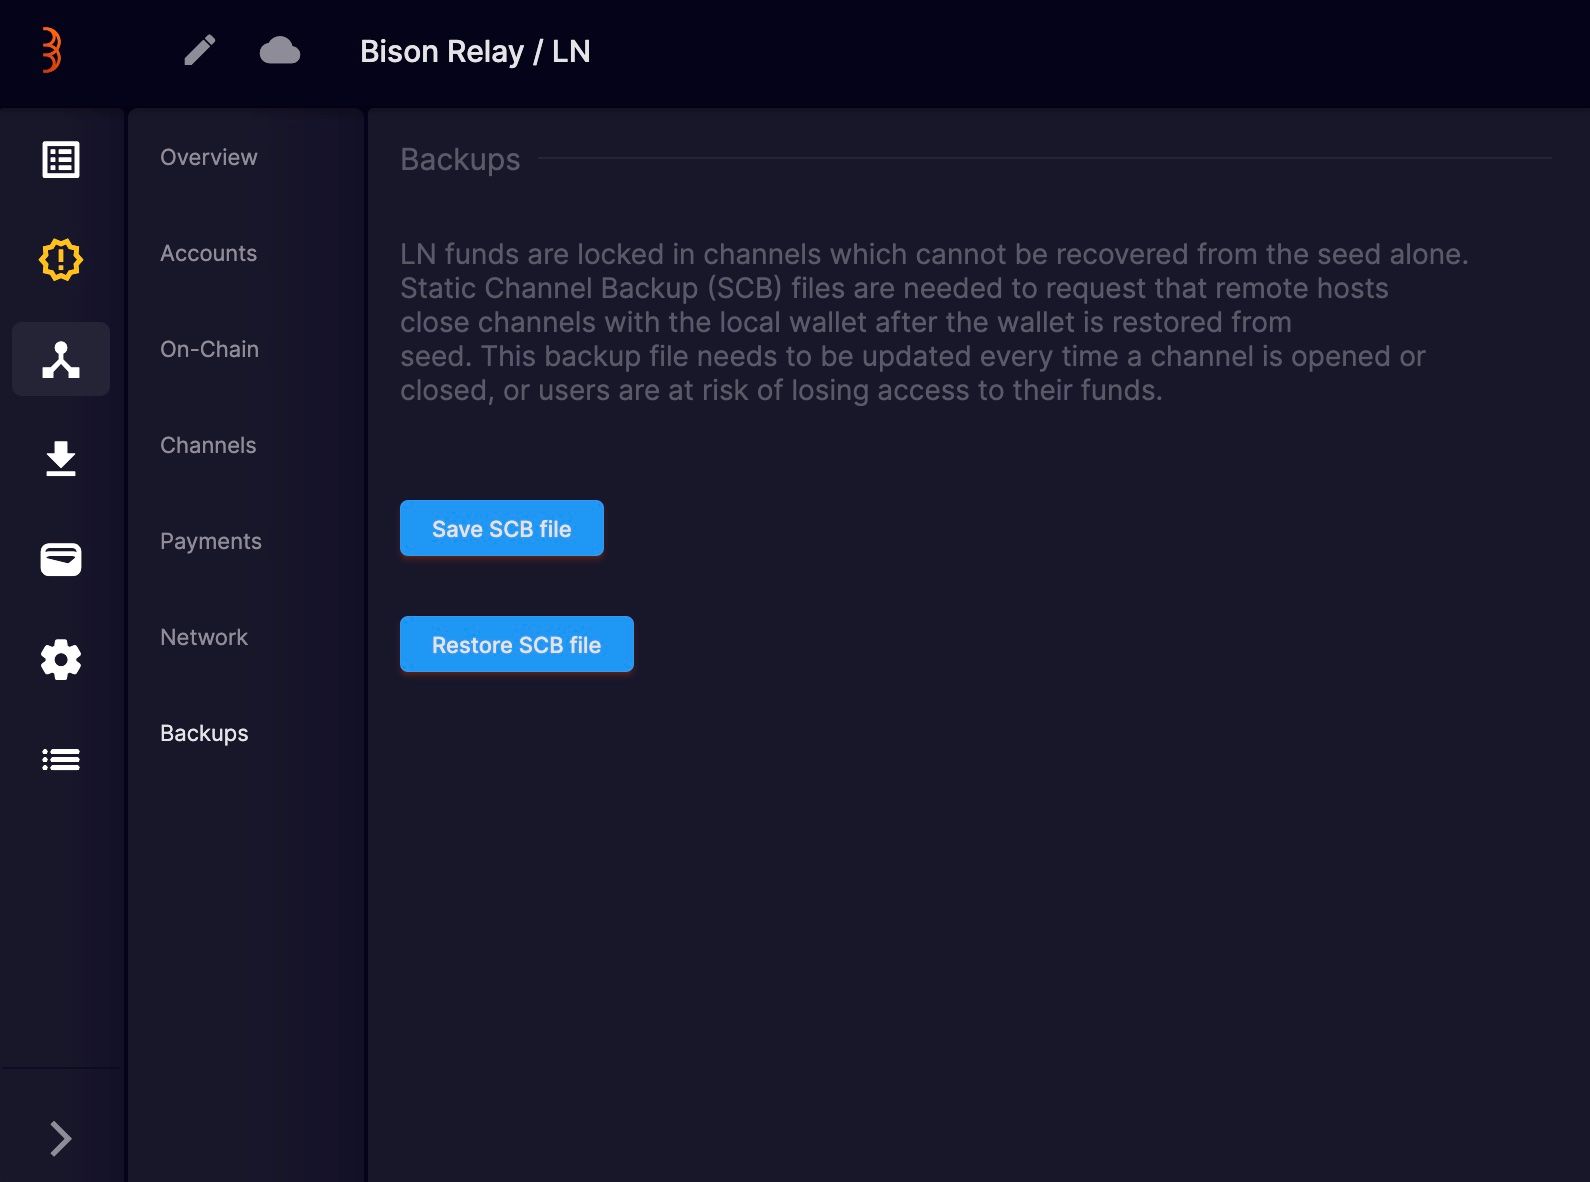
Backups section
The final area to discuss is the backups section. Although the SPV wallet is backed up from the seed saved when setting up Bison Relay, the Lighting Channels are not. In order to recover funds in these channels, you’ll need to click the “save SBV file” and save is somewhere safe on your computer or other storage device. An important note here is if you close and reopen new channels, this file will need to be resaved to back up the new channels and the funds in them.
Comments ()